 AtticShield

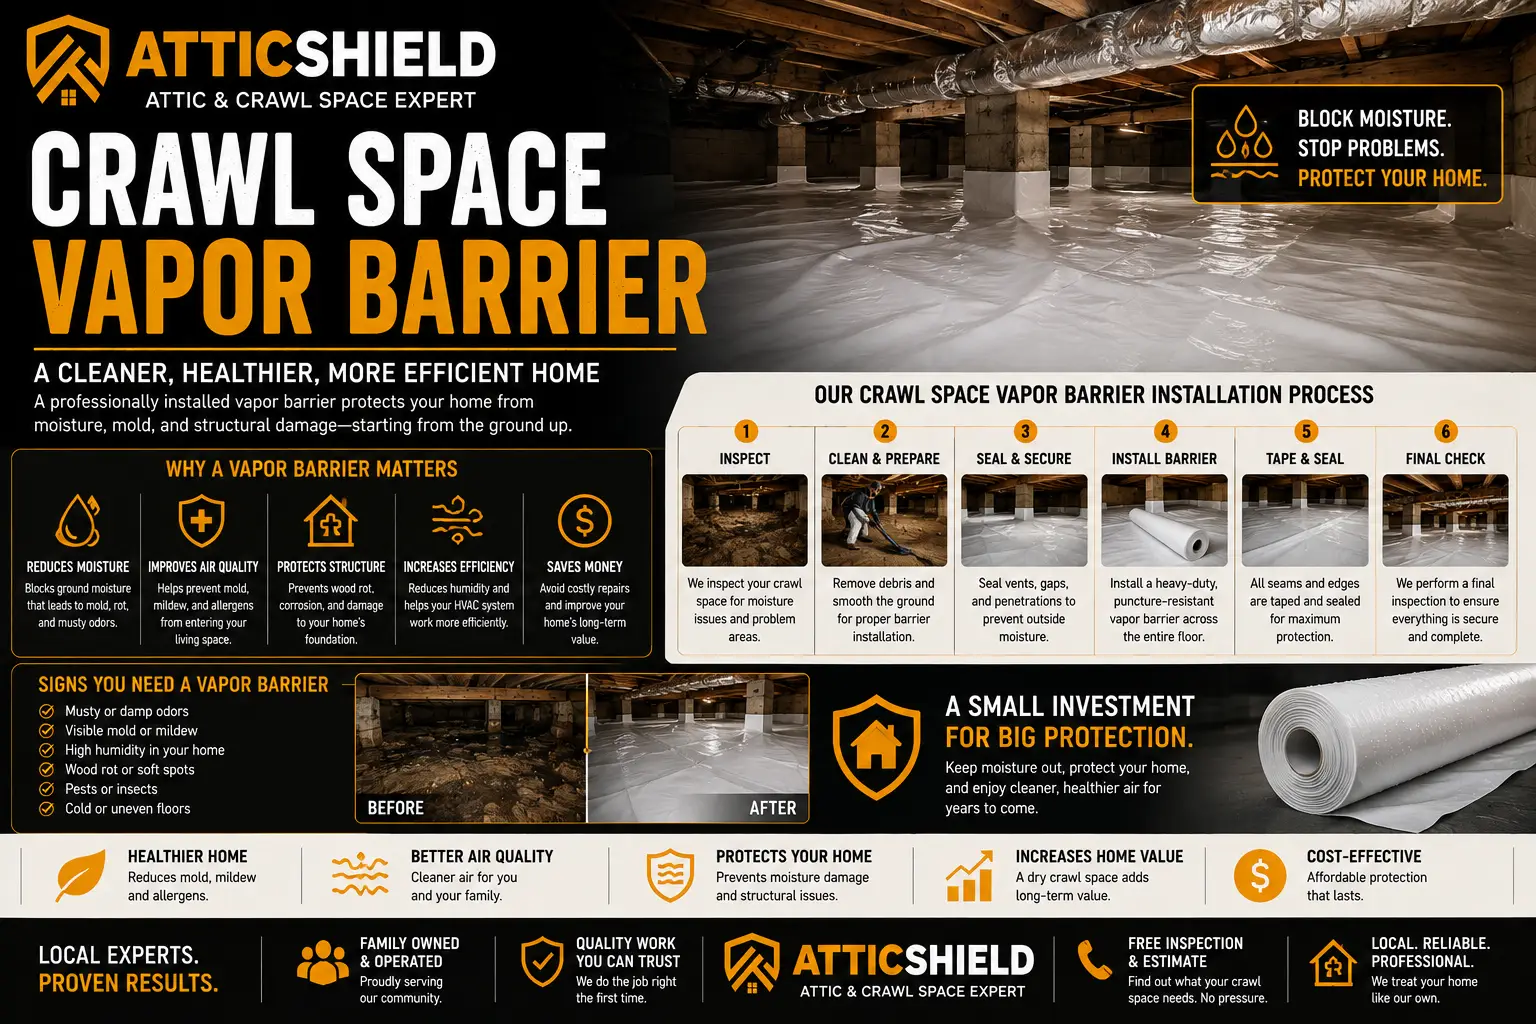
A crawl space vapor barrier is one of the least glamorous upgrades a house can get — a heavy sheet of plastic over dirt, in a space you never see. It’s also one of the highest-leverage ones, because the crawl space sits directly under every room you live in, and moisture rising from bare soil doesn’t stay down there. This guide covers what a vapor barrier actually does, how to tell whether your crawl space needs one, what proper installation involves, and what happens under homes that skip it.
If you’ve never once looked into your crawl space, you’re the person this article is for. Most Southern California homeowners with raised foundations haven’t — and the crawl space counts on it.

What’s in this guide
- What a crawl space vapor barrier is
- The moisture physics under your floor
- Why crawl space air becomes your air
- 9 signs your crawl space needs one
- What happens without one
- What proper installation involves
- Why the DIY version usually fails
- What pairs with a vapor barrier
- Barrier vs full encapsulation
- Lifespan and maintenance
- The Southern California angle
- Frequently asked questions
What a Crawl Space Vapor Barrier Actually Is
A crawl space vapor barrier is a continuous sheet of heavy polyethylene — commonly 6-mil thickness or heavier, with thicker reinforced material used where durability matters — laid across the exposed soil under your home, overlapped and sealed at the seams, and turned up at the foundation walls and piers.
Its job is single and specific: stop water vapor in the soil from evaporating into the crawl space air. That’s it. It’s not waterproofing against flooding, not insulation, not a substitute for fixing drainage problems. It’s a lid on the ground — and the reason that matters is what an unlidded ground does to everything above it.
The Moisture Physics Under Your Floor
The soil under a house is never truly dry. Even in our climate, ground moisture wicks upward continuously — irrigation, rain, marine-layer humidity, and the water table all feed it. Over bare soil, that moisture evaporates into the crawl space air around the clock; a typical crawl space’s exposed earth can release a startling amount of water vapor into the space every single day, year after year.
That vapor has nowhere good to go. Crawl spaces are shaded, cool, and poorly ventilated by design, so relative humidity climbs — and everything down there responds:
- Wood framing absorbs it. Floor joists, subfloor, and beams take on moisture, and persistently damp wood is the precondition for rot and fungal growth.
- Insulation absorbs it. Damp underfloor insulation sags, falls out of its bays, loses R-value, and molds — a pattern we see constantly during crawl space insulation removal.
- Metal corrodes. Ducts, straps, hangers, and pipe fittings rust in humid crawl spaces.
- Biology moves in. Humid, dark, undisturbed spaces are exactly what mold and pests select for.
The vapor barrier interrupts this at the source. Sealed over the soil, it forces ground moisture to stay in the ground — and measured crawl space humidity drops accordingly.
Why Crawl Space Air Becomes Your Air
Here’s the part that turns a “down there” problem into an “everywhere” problem. Houses breathe vertically: warm air rises and exits high, and replacement air gets drawn in low — and for a home on a raised foundation, “low” means the crawl space. A meaningful share of the air in your living space made a stop in the crawl space first, carrying whatever it picked up: humidity, musty odor compounds, mold spores, and dust.
The EPA’s indoor air quality guidance is blunt about the principle — indoor air quality is shaped by the spaces and pathways air moves through, not just the rooms you occupy. A humid, musty crawl space is upstream of your living room in that flow. Put simply: the barrier isn’t for the crawl space. It’s for the house on top of it.
9 Signs Your Crawl Space Needs a Vapor Barrier
From the access hatch — no crawling required
- Bare, visible soil. The simplest sign: if you see dirt, moisture is evaporating off it right now. No barrier means the answer is already “yes, at minimum consider one.”
- A musty smell at the hatch — or, more tellingly, a musty smell inside the house that worsens in humid weather or when the HVAC runs.
- Condensation on pipes, ducts, or the underside of the subfloor.
- Sagging or fallen underfloor insulation — damp fiberglass loses its grip and hangs from the joist bays like laundry.
- White, fuzzy, or dark staining on wood framing — fungal activity in progress.
- Rusty ducts, straps, or fasteners — the metal is logging the humidity for you.
- An existing barrier in ruins — shredded, displaced, or covering only patches. A torn barrier over half the soil is roughly half a barrier.
- Cupping hardwood floors or persistent cold-damp floors upstairs — moisture moving through the floor assembly.
- Pest and rodent activity. Humid crawl spaces attract the whole chain — insects, then the things that eat them, then rodents that treat your crawl space as a sheltered highway into the rest of the house. Rodent evidence down there gets handled by the same exclusion logic as the attic: our crawl space rodent proofing covers it.
Standing water is a different problem. A vapor barrier stops soil evaporation — it does not fix ponding water, drainage failures, or plumbing leaks. Visible water in a crawl space means the source gets diagnosed and corrected first; the barrier comes after. Anyone who quotes you a vapor barrier over standing water is installing plastic over a plumbing problem.
What Happens Without One: the Slow Sequence
| Stage | What’s happening | What it costs you |
|---|---|---|
| 1. Continuous evaporation | Soil moisture loads the crawl space air daily | Nothing visible yet — the free-feeling stage |
| 2. Materials absorb | Framing moisture rises; insulation dampens and sags; metal begins corroding | Underfloor R-value quietly declining; comfort and energy effects begin |
| 3. Biology establishes | Fungal staining on wood, musty odor migrating upstairs, pest pressure rising | Remediation now involved; cleanup plus insulation replacement, not just a barrier |
| 4. Structure and health | Rot in framing members; chronic indoor air quality complaints upstairs | Contractor trades beyond ours; the expensive end of a preventable curve |
If that table looks familiar, it’s because it’s the crawl space edition of the same compounding curve we documented for attics in the cost of ignoring attic problems. Same house physics, opposite end of the house — and the same lesson: stage 1 is the only cheap stage.
What Proper Crawl Space Vapor Barrier Installation Involves
The product is plastic sheeting; the value is in the preparation and the details. Here’s the sequence a professional installation follows:
- Inspection and moisture diagnosis first. Source identification — is this normal soil evaporation, or is drainage, grading, irrigation overspray, or a plumbing leak feeding it? Barriers go over healthy conditions, not active problems.
- Debris and hazard clearing. Construction scrap, old fallen insulation, sharp rock, and — commonly — rodent waste, which per CDC guidance requires careful handling and is part of professional crawl space cleanup, not a shovel job.
- Rodent exclusion while access is open. Vent screens and penetrations sealed to exclusion standard — the crawl space version of the sequencing logic that runs through all our work: do it while you’re there, or pay to come back.
- Full-coverage barrier placement. Heavy polyethylene across all exposed soil, seams generously overlapped and taped, material turned up at foundation walls and fitted around every pier — coverage is binary, and gaps around piers are where DIY jobs quietly fail.
- Securing. The barrier anchored so plumbers, inspectors, and time don’t drag it out of position.
- Underfloor insulation assessed — damaged material removed, and new crawl space insulation installed into a now-dry environment where it will actually last, per the priorities in the Department of Energy’s insulation guidance.
- After-photos. You see the finished crawl space the same way you’d never otherwise see it — documented, covered, sealed.
Why the DIY Version Usually Fails
Thin plastic, short life. Painter’s-drop-cloth-grade sheeting tears during installation and shreds within a couple of years of crawl space reality. Material thickness is the difference between a barrier and a gesture.
Coverage gaps around piers and edges. Vapor doesn’t respect 85% coverage — exposed strips at every pier and wall keep feeding the space. Fitting the barrier tight to obstructions is most of the labor, which is exactly the part DIY skips.
Unsealed seams. Overlapped-but-untaped sheets separate as the plastic relaxes, opening evaporation lanes down the middle of the crawl space.
Skipping the cleanup and exclusion underneath. A barrier laid over debris and rodent waste seals the evidence in and the entry points open. The prep is the project.
The misery factor is real. Crawl spaces are tight, dark, and unpleasant, and thorough work in them is genuinely hard. Most abandoned DIY barriers we find gave out at the far corners — the exact places moisture doesn’t stop caring about.
What Pairs With a Crawl Space Vapor Barrier
The barrier is the foundation move, and it’s rarely the only thing a neglected crawl space needs. The efficient path is bundling — the access, containment, and mobilization get paid for once:
- Crawl space cleanup — debris, fallen insulation, and contamination out before anything goes down.
- Rodent proofing — exclusion at vents and penetrations while everything is exposed.
- Insulation removal and replacement — damp, sagging underfloor insulation out; new material into a dry space.
- Duct repair where crawl space ducts are crushed, disconnected, or rodent-damaged — leaky crawl space ducts pull crawl space air straight into your HVAC.
And because it’s the same house: homeowners fixing the crawl space are usually the same ones with attic questions. The two projects share the identical logic — seal the boundary, fix the insulation, exclude the rodents, document everything — and we frequently inspect both in one visit. The attic side starts at our attic insulation cost guide.
Vapor Barrier vs Full Encapsulation: Knowing the Difference
Shopping this topic, you’ll encounter two related but different scopes, and the terminology gets blurred in sales conversations — so here’s the honest distinction:
- A crawl space vapor barrier is the ground cover described in this guide: heavy polyethylene over the soil, sealed at seams and fitted to piers, in an otherwise conventionally vented crawl space. It’s the foundational moisture fix, appropriate for the large majority of Southern California raised-foundation homes.
- Full encapsulation extends the membrane up the foundation walls, seals the vents, and conditions or dehumidifies the enclosed space — effectively bringing the crawl space inside the building envelope. It’s a larger project developed primarily for humid climates where vented crawl spaces chronically fail, and it has legitimate applications here in specific cases: severe persistent moisture, homes with extensive ductwork below, or indoor air quality projects.
The honest guidance for our climate: most homes get most of the benefit from the properly installed barrier plus cleanup, exclusion, and sound insulation — at a fraction of encapsulation’s cost. When conditions genuinely warrant the bigger scope, the inspection findings will show it in photos; a recommendation for encapsulation that arrives without measured moisture evidence deserves the same skepticism as any oversized scope.
How Long a Vapor Barrier Lasts — and What Maintenance It Needs
Installed properly with real material, this is one of the longest-lived improvements a house can get — quality polyethylene under a house, out of sunlight, lasts on the order of decades. What shortens its life is never the material aging; it’s events:
- Trades. Plumbers, HVAC techs, and inspectors crawl across it. Reinforced material shrugs this off; thin sheeting tears. After any under-house work, a quick hatch check confirms the barrier went back where it belongs.
- Rodents. An unexcluded crawl space lets rodents nest under and shred the barrier — one more reason exclusion belongs in the original scope.
- Water events. A plumbing leak or drainage failure ponding on top of the barrier isn’t a barrier failure, but it’s a signal the space needs attention beyond it.
Maintenance is accordingly minimal: a flashlight look from the hatch once a year — same calendar slot as your annual attic check — confirming the barrier is positioned, intact, and dry on top. Thirty seconds, and the crawl space stays the solved problem it became on installation day.
The Southern California Angle
Raised foundations with crawl spaces are everywhere in our region’s older housing stock — from National City and La Mesa through Escondido and out to Fallbrook — and three local factors make the vapor barrier question more relevant here than homeowners assume:
- Coastal humidity works year-round. West of I-15, marine-layer moisture keeps crawl spaces damp even through rainless months — the evaporation cycle doesn’t need storms.
- Irrigation is the hidden rain. Sprinkler systems running against foundation lines feed crawl space soil moisture in a climate that would otherwise dry it. Overspray correction is one of the cheapest moisture fixes that exists.
- Rodent pressure connects the two ends of the house. The same roof rats that target attics use crawl spaces as ground-level shelter and highways. A crawl space project that skips exclusion is half a project — the full picture is in our guides to signs of rats in the attic and roof rats vs mice.
Frequently Asked Questions
Do I need a crawl space vapor barrier in Southern California?
If your crawl space has bare soil, the moisture cycle is running — our dry climate slows it but doesn’t stop it, and coastal humidity plus irrigation feed it year-round. The signs list above tells you how urgent it is; bare soil plus any musty odor or condensation is a clear yes.
What thickness should a crawl space vapor barrier be?
Heavy polyethylene, commonly 6-mil at minimum, with thicker reinforced material where durability and traffic warrant it. Thin sheeting is the single most common reason existing barriers we find have failed.
Does a vapor barrier stop flooding or standing water?
No. It stops soil evaporation. Standing water means a drainage, grading, irrigation, or plumbing problem that must be diagnosed and fixed first — the barrier comes after the space is sound.
Will it help the musty smell in my house?
If the smell originates in crawl space humidity — a very common source — then yes, cutting the evaporation at the soil is the root-cause fix, usually paired with cleanup of whatever the humidity already affected.
How long does installation take?
Most installations, including cleanup and sealing details, complete in a day; larger scopes with insulation replacement and rodent work typically run one to two days.
Can I lay plastic down myself?
Physically, yes. In practice, DIY barriers fail at the details — thin material, unsealed seams, gaps at piers, and skipped cleanup and exclusion underneath. If you do go DIY, use heavy material, tape every seam, and fit every pier; the far corners count the most and are the worst to reach.
Does the crawl space really affect my indoor air?
Yes — houses draw replacement air from low to high, and the crawl space is the lowest source. The EPA’s indoor air quality framework treats the pathways air travels as part of indoor air, and your crawl space is on the pathway.
Find Out What’s Under Your House
Most homeowners have never seen their own crawl space, which makes it the easiest place in the house for a slow problem to run unopposed. A free inspection ends that: moisture conditions, barrier status, insulation condition, rodent evidence, and duct condition — photographed and explained, with a written scope separating what needs doing from what doesn’t.
Free crawl space inspection, no obligation
See your crawl space for the first time — in photos, with a straight answer about what it needs. Attic and crawl space can be inspected in one visit. Serving San Diego County, Southwest Riverside County, and South Orange County.
Request your free inspection or call (858) 402-0066Attic Shield is licensed, bonded, and insured. CSLB #1138021, C-2 and B classifications. See our full service area.