 AtticShield

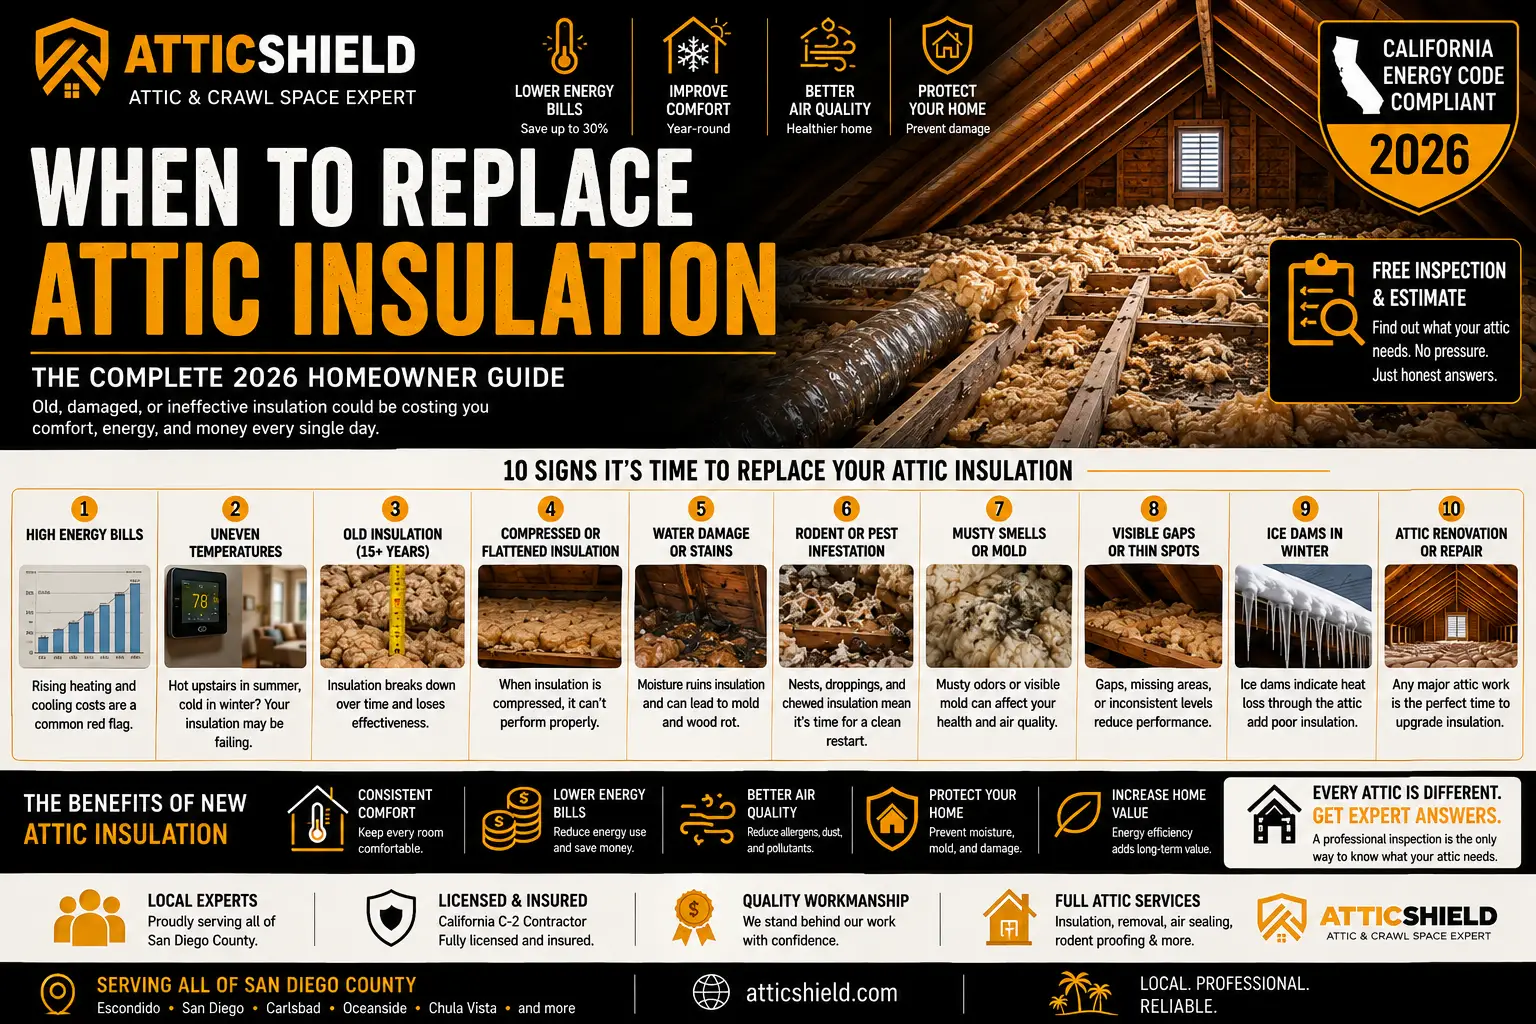
Knowing when to replace attic insulation — versus when you can simply add more on top — is one of the most financially important calls in home maintenance, because getting it wrong in either direction wastes real money. Replace insulation that only needed topping off and you’ve paid for removal you didn’t need. Top off insulation that needed replacing and you’ve buried a problem under fresh material.
The good news about when to replace attic insulation: the answer isn’t a judgment call. Specific, checkable conditions decide it, and most of them are visible from the attic hatch with a flashlight. This guide walks through all nine.
The one-sentence rule. Insulation gets replaced when it’s contaminated, has been wet, or is structurally ruined (compacted, tunneled, deteriorated). It gets topped off when it’s clean, dry, intact — just thin. Everything below is the detail behind that sentence.

What’s in this guide
- Does insulation actually go bad?
- The 9 warning signs, ranked
- When topping off is the right call
- The decision chart
- Why covering bad insulation fails
- Age by material type
- Your 10-minute self-check
- What replacement actually involves
- 4 mistakes with this decision
- When’s the best time?
- What it costs — anchor figure
- Frequently asked questions
Does Attic Insulation Actually Go Bad?
The material itself is more durable than most people expect. Fiberglass doesn’t rot, doesn’t feed mold on its own, and its fibers don’t degrade on any timeline that matters for a house. Under laboratory conditions, fiberglass insulation could perform for many decades.
Attics are not laboratory conditions. What ages insulation is everything that happens to it:
- Rodents tunnel through it, flatten it into nests, and saturate it with urine and droppings
- Moisture from roof leaks, duct condensation, and bathroom fans venting into the attic mats it down and invites mold
- Compaction from foot traffic, stored boxes, and decades of settling crushes the air pockets that create R-value in the first place
- Dust and debris from construction work, electrical jobs, and simple time load it up
- Displacement — trades pushing it aside for HVAC, cable, and solar work and never putting it back
So the honest answer to “how long does attic insulation last?” is: the material can last a very long time; the conditions around it usually don’t let it. Which is why the replacement question is answered by inspection, not by age.
When to Replace Attic Insulation: The 9 Warning Signs
Ranked by how definitively each one settles the question. The first four are non-negotiable; the rest depend on severity.
1. Rodent contamination
Droppings, urine staining, nests, tunneling, or a persistent ammonia-like odor. This is the most common replacement trigger in Southern California, and it’s absolute — contaminated insulation is a health issue, not just a performance one. The CDC’s rodent guidance covers why droppings and urine require careful handling rather than casual cleanup.
Two things make this trigger unforgiving. Urine soaks in — it cannot be spot-cleaned out of loose insulation. And contaminated material carries pheromone trails that actively attract the next generation of rodents. Replacement here means the full sequence: waste removal, insulation removal, sanitizing, and sealing the entry points — in that order — before anything new goes in. More on the damage mechanism in how rodents destroy insulation R-value.
2. It’s wet, or it has ever been soaked
Water flattens the air pockets that make insulation work, and wet organic dust inside the material becomes a mold food source. Even after it dries, soaked insulation doesn’t recover its loft or its R-value, and it may carry mold spores. Roof leak, plumbing leak, or heavy condensation history over a section of insulation = that section comes out at minimum.
3. Visible mold or persistent musty odor
Dark staining, fuzzy growth, or a musty smell that doesn’t clear. Mold in insulation means moisture happened; both the material and the moisture source need addressing. Removing the insulation without fixing the leak or ventilation problem just schedules a repeat. The EPA’s indoor air quality resources explain why attic contaminants don’t reliably stay in the attic — air movement carries them down.
4. Vermiculite from the pre-1990 era
Loose, pebble-like, gray-brown or silvery granules in an older home may be vermiculite, some of which contains asbestos. Do not disturb it, do not vacuum it, do not add anything on top of it. This one leaves the DIY conversation entirely: it requires testing and, if positive, licensed abatement before any other attic work happens.
5. Compaction and tunneling
Insulation crushed to a fraction of its installed depth has lost most of its value — R-value lives in trapped air, and compacted material has none to trap. Widespread flattening from storage, foot traffic, or rodent tunneling usually means replacement. Localized crush zones around the hatch or along a single walkway can sometimes be addressed within a top-off project.
6. Patchy, uneven, or missing coverage
Bare drywall visible between joists, wind-scoured thin spots, sections pushed aside by past trades and never restored. Gaps are disproportionately damaging — a small uncovered fraction of the ceiling can undercut the performance of everything around it. Scattered small gaps get fixed during a top-off; large missing sections alongside other damage tip toward replacement.
7. Dark, dirty streaks through the material
Blackened or gray-streaked bands in fiberglass mark where air has been moving through it for years, filtering dust as it goes. The streaks themselves are cosmetic — but they’re a map of your air leaks, and heavily filtered insulation has been underperforming the whole time. This sign points as much at air sealing as at the insulation, and it’s the classic case where the right project is sealing plus either deep cleaning of the layout or replacement, depending on severity.
8. Your house is telling you
Hot upstairs rooms, cold winter floors, an HVAC system that never seems to rest, energy bills drifting up with no rate change, rooms that swing with the weather. None of these alone proves the insulation is bad — ducts, sealing, and ventilation produce the same symptoms — but they’re the reason to go look. We walk the full diagnostic in why is my upstairs so hot.
9. It’s simply old and thin
Age alone is the weakest replacement argument on this list — but old attics were insulated to old standards. A 1970s home built to the era’s minimum might have ≈6.5 inches of blown fiberglass (about R-19). Today’s Title 24 minimum for most of San Diego County is R-38 — about 13.25 inches — and we typically recommend R-44 at ≈15 inches. If the old material is clean, dry, and intact, this is the textbook top-off case, not a replacement case. Old and clean is an opportunity; old and contaminated is a project.
When Topping Off Is the Right Call
Knowing when to replace attic insulation also means knowing when not to. Replacement isn’t the default, and a contractor who prescribes it for every attic deserves skepticism. Adding new insulation over existing is legitimate and cost-effective when all of these are true:
- No rodent evidence — no droppings, tunnels, nests, or odor
- Never been wet — no leak history over the insulated area, no staining
- No mold, no musty smell
- Not vermiculite
- Material is reasonably intact — thin is fine, ruined is not
- The ceiling plane below it can still be air sealed, or already has been
That last condition is the one homeowners never hear about. Once new insulation is down, the ceiling plane is buried — and sealing it later means paying to move the material you just paid to install. The sequence question is big enough that we wrote a full guide on it: air sealing vs insulation.
The Decision Chart
Why Covering Bad Insulation Fails Every Time
The temptation is obvious: removal costs money, and new insulation over old looks identical to new insulation over a clean deck once the job is done. Here’s what actually happens under the fresh layer:
Contamination doesn’t neutralize — it incubates. Rodent urine, droppings, and pheromone trails keep doing what they do under the new material. Odors migrate. New rodents follow the old trails, and now they’re nesting in your brand-new insulation too.
Moisture gets trapped. Damp material buried under fresh insulation dries slower, not faster. You’ve built a mold environment with better cover.
The ceiling plane becomes unreachable. Every unsealed penetration under the pile keeps leaking conditioned air — and now sealing them means excavating the new insulation you just bought. Per EPA and ENERGY STAR estimates, sealing plus insulating saves an average of about 15% on heating and cooling — burying the sealing opportunity forfeits a large share of that.
The R-value math lies. New R-19 over crushed, tunneled R-old does not add up the way the invoice implies. Air moving through gaps and tunnels in the bottom layer bypasses the top layer’s resistance. You paid for a number the assembly can’t deliver.
Age and Condition by Material Type
| Material | Typical era found | Ages how | Replacement pattern |
|---|---|---|---|
| Blown fiberglass | 1980s–today | Durable; fails by contamination and compaction, not decay | Condition-driven — clean old fiberglass tops off well |
| Fiberglass batts | 1960s–today | Slumps out of position, gaps at edges, crushed by traffic | Displaced or gapped batts often worth replacing during a larger project |
| Cellulose | 1970s–today | Settles more over time; very vulnerable to moisture | Wet cellulose is always a removal; dry settled cellulose can be topped |
| Rock wool / early loose fill | pre-1970s | Heavy dust load after decades | Usually removed during modernization |
| Vermiculite | ~1920s–1990 | May contain asbestos | Test first. Never disturb. Licensed abatement if positive. |
Depth reference for blown fiberglass: R-19 ≈ 6.5″, R-30 ≈ 10″, R-38 ≈ 13.25″, R-44 ≈ 15″, R-49 ≈ 16.5″. Cellulose reaches the same R-values at less depth. Material comparison in our cellulose vs. fiberglass guide.
Your 10-Minute Self-Check
From the hatch, with a flashlight — no crawling required
- Smell before you look. Ammonia = rodents. Musty = moisture. Either one is already your answer.
- Depth vs. joists. Joists are typically 8–10 inches. Insulation below the joist tops is well under code; you should not be able to see the joists at all in a modern attic.
- Scan for surface evidence. Droppings look like dark grains of rice. Tunnels and flattened runways in the insulation surface are rodent highways.
- Look for staining. Water marks on the sheathing above, matted dark patches in the material below.
- Check the color. Uniform = good. Gray/black streaks = air has been filtering through it for years.
- Look at the eaves. Insulation packed against the roof deck with no baffles means your ventilation intake is buried too.
Safety, every time. Southern California attics regularly exceed 140°F from late spring through October. Check early in the morning, never alone, and stay on the hatch — this checklist is designed so you don’t have to crawl. If you see possible vermiculite or heavy contamination, stop and close the hatch; those need professional handling.
What Replacement Actually Involves
When the answer to when to replace attic insulation comes back “now,” the work is a sequence — and the sequence is why it works:
- Protection and containment. Floors, stairs, and the hatch area covered; containment at the access so removal debris stays out of your house.
- Removal. Commercial vacuum extraction of the old material into sealed bags — not garbage bags down the hallway.
- Cleanup and sanitizing where contamination existed, neutralizing bacteria and odor at the source.
- Rodent entry sealing while every entry point is exposed and reachable.
- Air sealing the ceiling plane — the once-in-decades chance to do it at full access.
- Baffles at the eaves so the new insulation can’t bury the ventilation intake.
- New insulation blown to target — R-38 minimum under Title 24, R-44 recommended for most homes, R-49 for inland heat — with depth markers so the finished depth is verifiable, not claimed.
- After-photos documenting the finished attic.
Steps 3 through 6 are the reason replacement and “just blow more in” are different products. They’re only possible while the deck is clear — which is the entire economic logic of doing them together.
4 Mistakes Homeowners Make With This Decision
1. Letting the material’s age make the call. “It’s 30 years old, it must be shot” removes clean, functional insulation that only needed depth added — paying for removal that bought nothing. “It’s only 10 years old, it must be fine” leaves a rodent-contaminated layer in place because it’s young. Condition decides when to replace attic insulation; the calendar doesn’t.
2. Judging from the hatch’s best angle. The area around the hatch is the most disturbed, most compacted part of most attics — and also the only part many people ever see. Conversely, contamination often concentrates at the quiet perimeter where rodents nest. A hatch-glance is a screening tool; the decision needs the whole attic looked at, with photos.
3. Solving a smell with air freshener logic. Odor migrating from the attic is data — ammonia means rodents, must means moisture. Masking it downstairs while the source sits upstairs converts a stage-two problem into a stage-three one. The smell isn’t the problem; it’s the notification.
4. Booking removal without booking the sequence. Removal alone, with new insulation blown the same day and nothing in between, skips the once-in-decades window when the ceiling plane is exposed. Sanitizing, entry-point sealing, air sealing, and baffles are only cheap while the deck is clear. A removal quote that doesn’t mention them isn’t a bargain — it’s an incomplete scope.
If You’re Replacing, When’s the Best Time?
The work happens year-round, but the calendar has real effects worth knowing:
- Late fall through spring is the comfortable window. Attic temperatures are workable, crews move faster, and scheduling is more flexible than in the summer rush.
- Before summer beats during summer. The homeowners who call in July are calling because the house already failed the heat. Completing the work in spring means the first heat wave arrives after the fix, not before it.
- Before listing beats during escrow. If a sale is on the horizon, handling the attic on your own timeline — with documentation and after-photos in hand — is consistently cheaper and calmer than negotiating it under an inspection deadline.
- Alongside other attic-touching work. Re-roofing, solar installation, HVAC replacement, and duct work all disturb the attic anyway. Coordinating insulation replacement with them saves mobilization and prevents the new material from being trampled by the next trade.
What It Costs — the Anchor Figure
The honest answer is a range, because attic size, access, and contamination level drive it. For orientation: on a typical attic around 1,200 square feet, removal plus air sealing plus new insulation commonly lands in the $3,900 to $5,600 range before any rodent restoration work; a clean top-off with sealing runs meaningfully less. Rodent-affected attics add the waste removal, sanitizing, and exclusion sequence on top.
The complete breakdown — every service, what moves prices, why bundled scopes cost less per item, and example scenarios by attic size — is in our attic insulation cost guide. A free inspection is what turns the ranges into a real number for your attic, and plenty of homes turn out to need the smaller project.
Find out which one your attic is
Free inspection with photos: insulation condition documented, depth measured, contamination checked, and a written answer — replace, top off, or leave it alone.
Request a free inspection or call (858) 402-0066Frequently Asked Questions
How do I know when to replace attic insulation vs just adding more?
Replace when it’s contaminated by rodents, has been wet, shows mold, or is structurally ruined by compaction and tunneling. Add more when it’s clean, dry, and intact — just thin. Age by itself is not a replacement reason; condition is.
How long does attic insulation last?
The material can perform for decades. What ends its life early is what happens to it — rodents, moisture, compaction, and displacement by other trades. That’s why the answer comes from an inspection, not a calendar.
Can I just spray something on rodent-contaminated insulation?
No. Urine soaks into loose insulation and cannot be surface-treated out, and contaminated material carries scent trails that attract new rodents. Sanitizing is a critical step — but it happens after removal, on the cleared deck, not on top of the contaminated material.
Is it worth replacing insulation before selling a home?
Often, yes — buyers’ inspectors look in attics, and contaminated insulation found during escrow routinely produces repair-credit demands larger than the cost of handling it beforehand. Our guide for sellers covers this: fix these attic issues before your buyer’s inspection.
What R-value should the new insulation be?
R-38 is the Title 24 minimum for most of San Diego County — about 13.25 inches of blown fiberglass. We recommend R-44 (≈15 inches) as the best value, since the labor and setup are already paid for, and R-49 (≈16.5 inches) for inland homes with heavy cooling loads.
How long does replacement take?
Most full replacements — removal, sealing, and new insulation — finish in one to two days. Add rodent restoration and it’s typically two days.
Will I see it on my energy bill?
Per Department of Energy guidance and EPA/ENERGY STAR estimates, sealing plus proper attic insulation saves an average of about 15% on heating and cooling costs — with the comfort change usually noticed before the bill change.
Who is licensed to do this work in California?
Insulation work requires a C-2 Insulation and Acoustical Contractor license — a general B contractor cannot legally perform it alone. Verify anyone you’re considering at the CSLB; our guide to checking a contractor license walks through it. Attic Shield holds C-2 and B licenses, CSLB #1138021.
Attic Shield is licensed, bonded, and insured. Serving San Diego County, Southwest Riverside County, and South Orange County — see our full service area.